
But really, when ISN’T it beer season? And what better way to get the party started than by making sure everyone cracks one open?!
This DIY wall mounted bottle opener is ideal for any beer lover in your life. It’s the perfect birthday, house warming, or Christmas gift (sorry that this post is after Christmas, I couldn’t give away my gift ideas before they opened them).
The three that I made were finished in different ways to create variety, but get creative with how you decide to finish yours!
First, find some wood.
I started this project very ambitiously, and bought an 8 foot piece of wood that I thought I would cut, sand, and stain, but then Michael’s happened. And to no surprise, Michael’s has every size, shape, and type of wood, ready to go. So obviously I opted for the second choice.
Next, you need to stencil that bad boy.
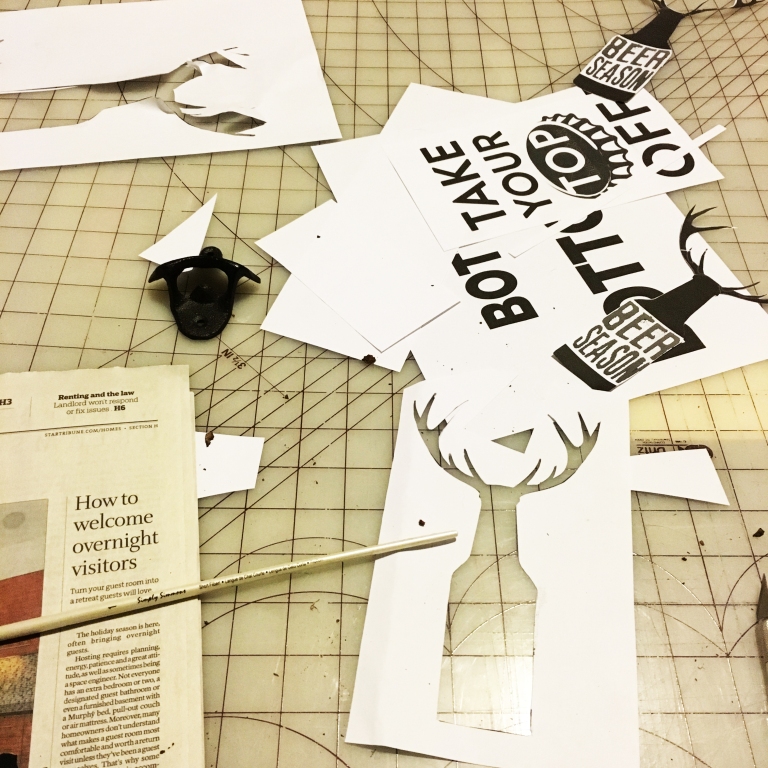
Yes, I’m sure you’re very good at free handing, but stencils are always a good idea. Pick a cool font, throw it into Word, and away you go. The beer related phrases I liked were:
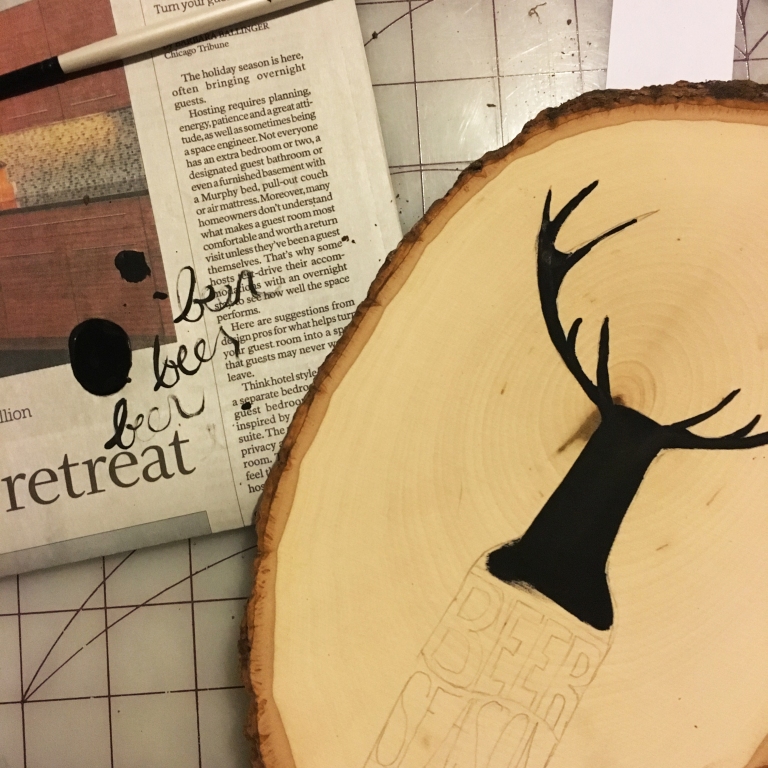
- Beer Season (accompanied by beer bottle with antlers)
Download Stencil Here - Take Your Top Off
Download Stencil Here - Bottoms Up
Download Stencil Here - Drink Up
- It’s Better Not To Leave Things Bottled Up
After your stencil is printed and cut, you’re ready to choose your finish.
All three finishes create a very different look. The first look was very natural. I didn’t use any stain or finish, and just painted right onto the wood. This was the outdoorsy look I was going for, as I gifted these to the hunters in my life.
The second look I tried was staining. Stain is very inexpensive and goes a long way. If you’ve never stained before, the easiest way to do so is to spread it with a foam brush, let it sit for a few minutes, and then wipe it off with an old t-shirt (I’ve found that a t-shirt spreads and absorbs stain much cleaner, but paper towels will work as well). Continue this process until you have reached your desired color.

The third finish I tried was distressing. This was my first time using paint that was made for distressing, and it was very quick and easy. I would recommend only using one thick coat of chalk paint, let it dry, and then sand it away. The more layers of paint you put on, the harder it will be to sand off (shout out to Carley’s burn marks on her hands from her intense sanding).
If you wish to have a different color peak through when you are distressing, paint on one thick coat of your first color, and then another layer of your second color, and distress.
*After talking to my local Hobby Lobby professional, there really isn’t a need for a finish or wax if you are distressing anything other than furniture. So save your money.
After your stain has dried, apply your stencil, trace, and paint! I used regular white and black acrylic paint and a very fine paintbrush to create my designs. This process could be wrapped up very quickly with a thick stencil and can of spray paint, but I personally like the look of brush strokes. I think it adds value to the “handmade-ness” of the finished product.
The final step is to attach your openers.
Tracking down these bottle openers proved to be the most difficult part of this process, but the Maple Grove Hobby Lobby is bountiful in rustic openers. These can easily be found online, and Target currently has bulldog and bear bottle openers, which I snagged a few of, because they’re badass.

Cheers to your new bottle opener! Tag your project with #theprintableproject on Instagram to show off your new decor!
-originally published December 29th, 2015-


Love love love
LikeLiked by 1 person
Thank you!
LikeLike
Did you seal these at all with urethane or mod podge or anything? Worried that the acrylic paint will chip off or something…
LikeLike
Hi Kelsey! Yes, I use an aerosol poly finish at the end (Minwax brand, to be specific).
LikeLike
thank you SO much for sharing! Can’t wait to give this a try and begin Christmas crafting
LikeLike
Can you help me with up the link to print
Drink up
It’s better not to leave things bottled up.
There doesn’t seem to be a link for it. There are 4 phrases and only 3
Thank you very much
LikeLike
Hi Jennifer! I actually don’t have actual stencils for those two phrases, they are just recommendations! I think I should make some updates for the upcoming gifting season though!
LikeLike